Folding Prefold Nappies

Terry squares and prefolds are a traditional and very economical choice for your nappy system. They can be folded in a whole host of different ways, so you can get the exact fit and containment your little one needs. Here you can find a selection of the most popular terry square and prefold folds, along with step-by-step instructions, pictures and videos to show you how easy it can be to find the right fold for your baby. Check out our terry square advice pages for individual step-by-step photo guides to some of our favourite folds.
Prefold Folds
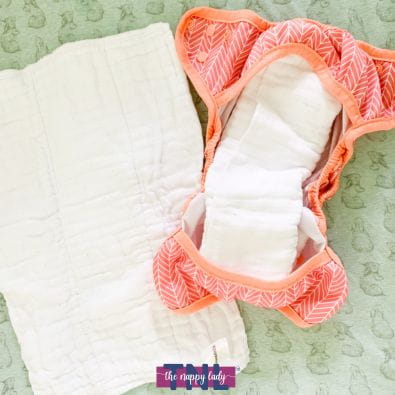
A prefold is another flat square of fabric, usually smaller than a terry square. They have a thicker pad in the centre containing more layers of fabric.
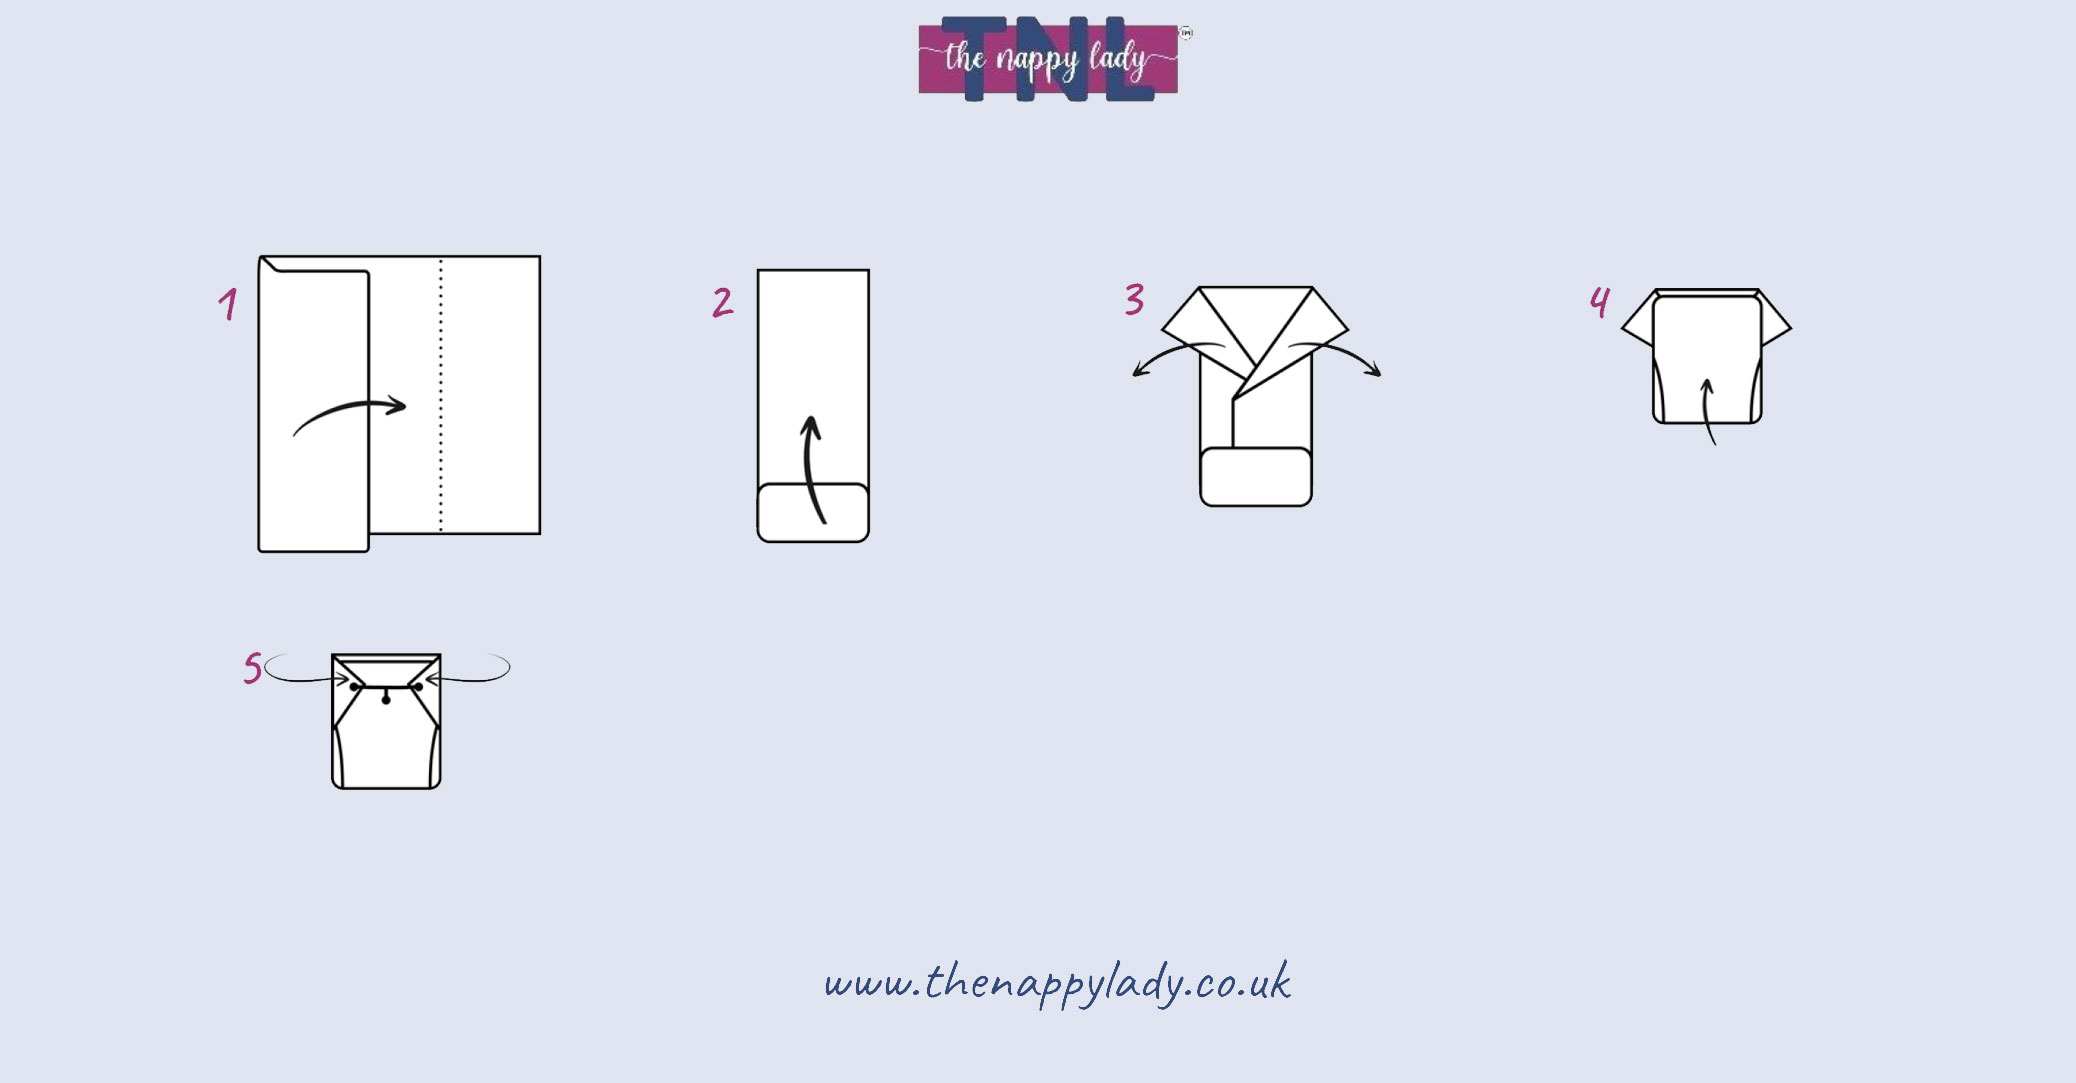
Prefold Basic Angel Wing Fold
This fold can be used with either newborn or toddler-size prefolds. It gives excellent absorbency and a trim fit.
- Fold the sides of the prefold across the centre panel to form a pad.
- Fold a small portion of the prefold up in the front.
- Unfold the sides at the back of the prefold to form two wings.
- Place the prefold under the baby. Bring the front of the prefold up between the baby's legs.
- Bring the two wings around from the back and fasten with a nappy nippa.
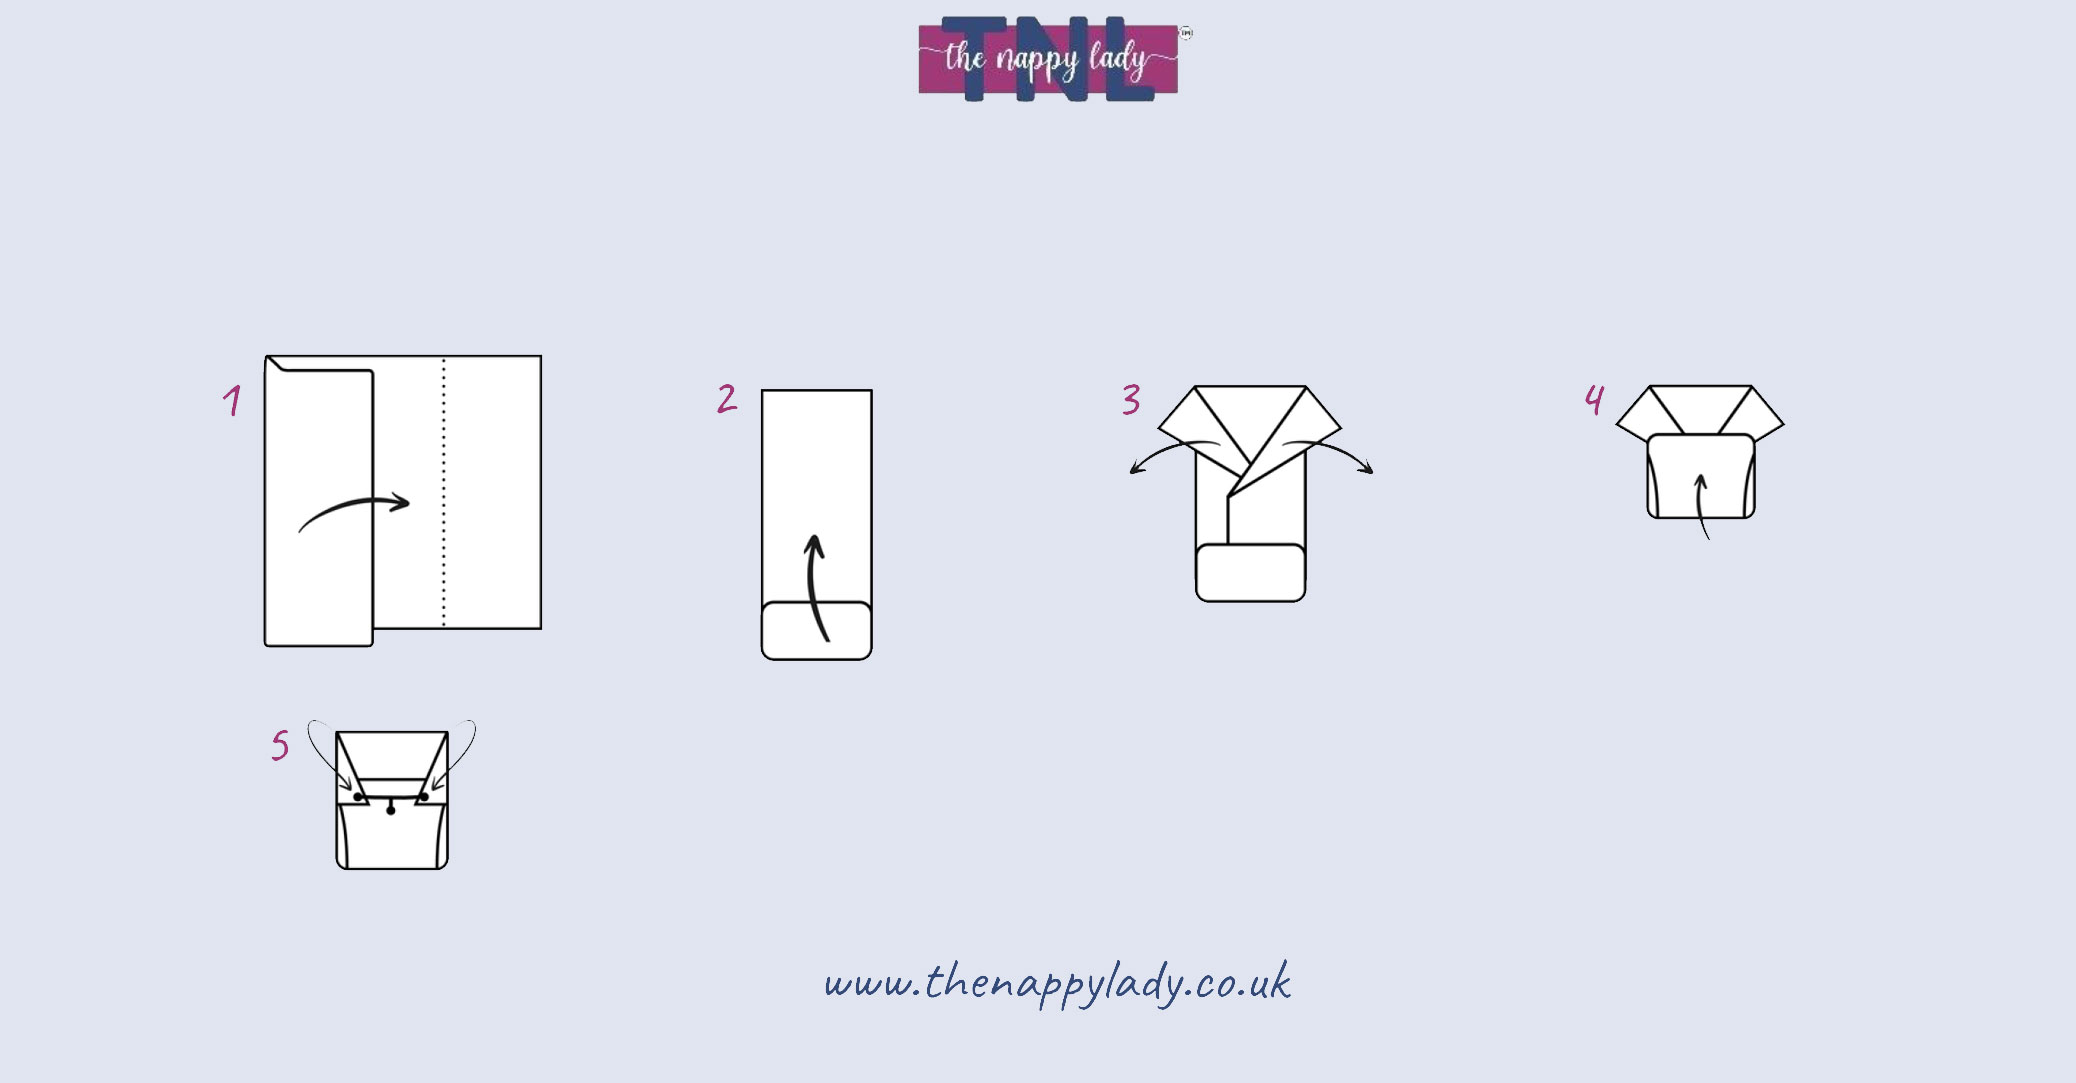
Double Angel Wing For Prefolds
Follow the same instructions used in the Basic Angel Wing, but stack two nappies for the Double Angel Wing fold. Big bum alert!
Navel Defence For Prefolds
Use this variation if you want to avoid the nappy covering baby's healing navel. Because newborn-size nappies are so flexible, they can be folded lower at the front to achieve this.
- Fold the sides of the prefold across the centre panel to form a pad.
- Fold a small portion of the prefold up in the front.
- Unfold the sides at the back of the prefold to form two wings.
- Place the prefold under the baby. Bring the front of the prefold up between the baby's legs but do not fold it all the way up to the back of the nappy.
- Bring the two wings around from the back and fasten with a nappy nippa. You will have a noticeable dip in front that comes well below the healing navel. When the baby's navel has healed, change to the Angel Wing fold.
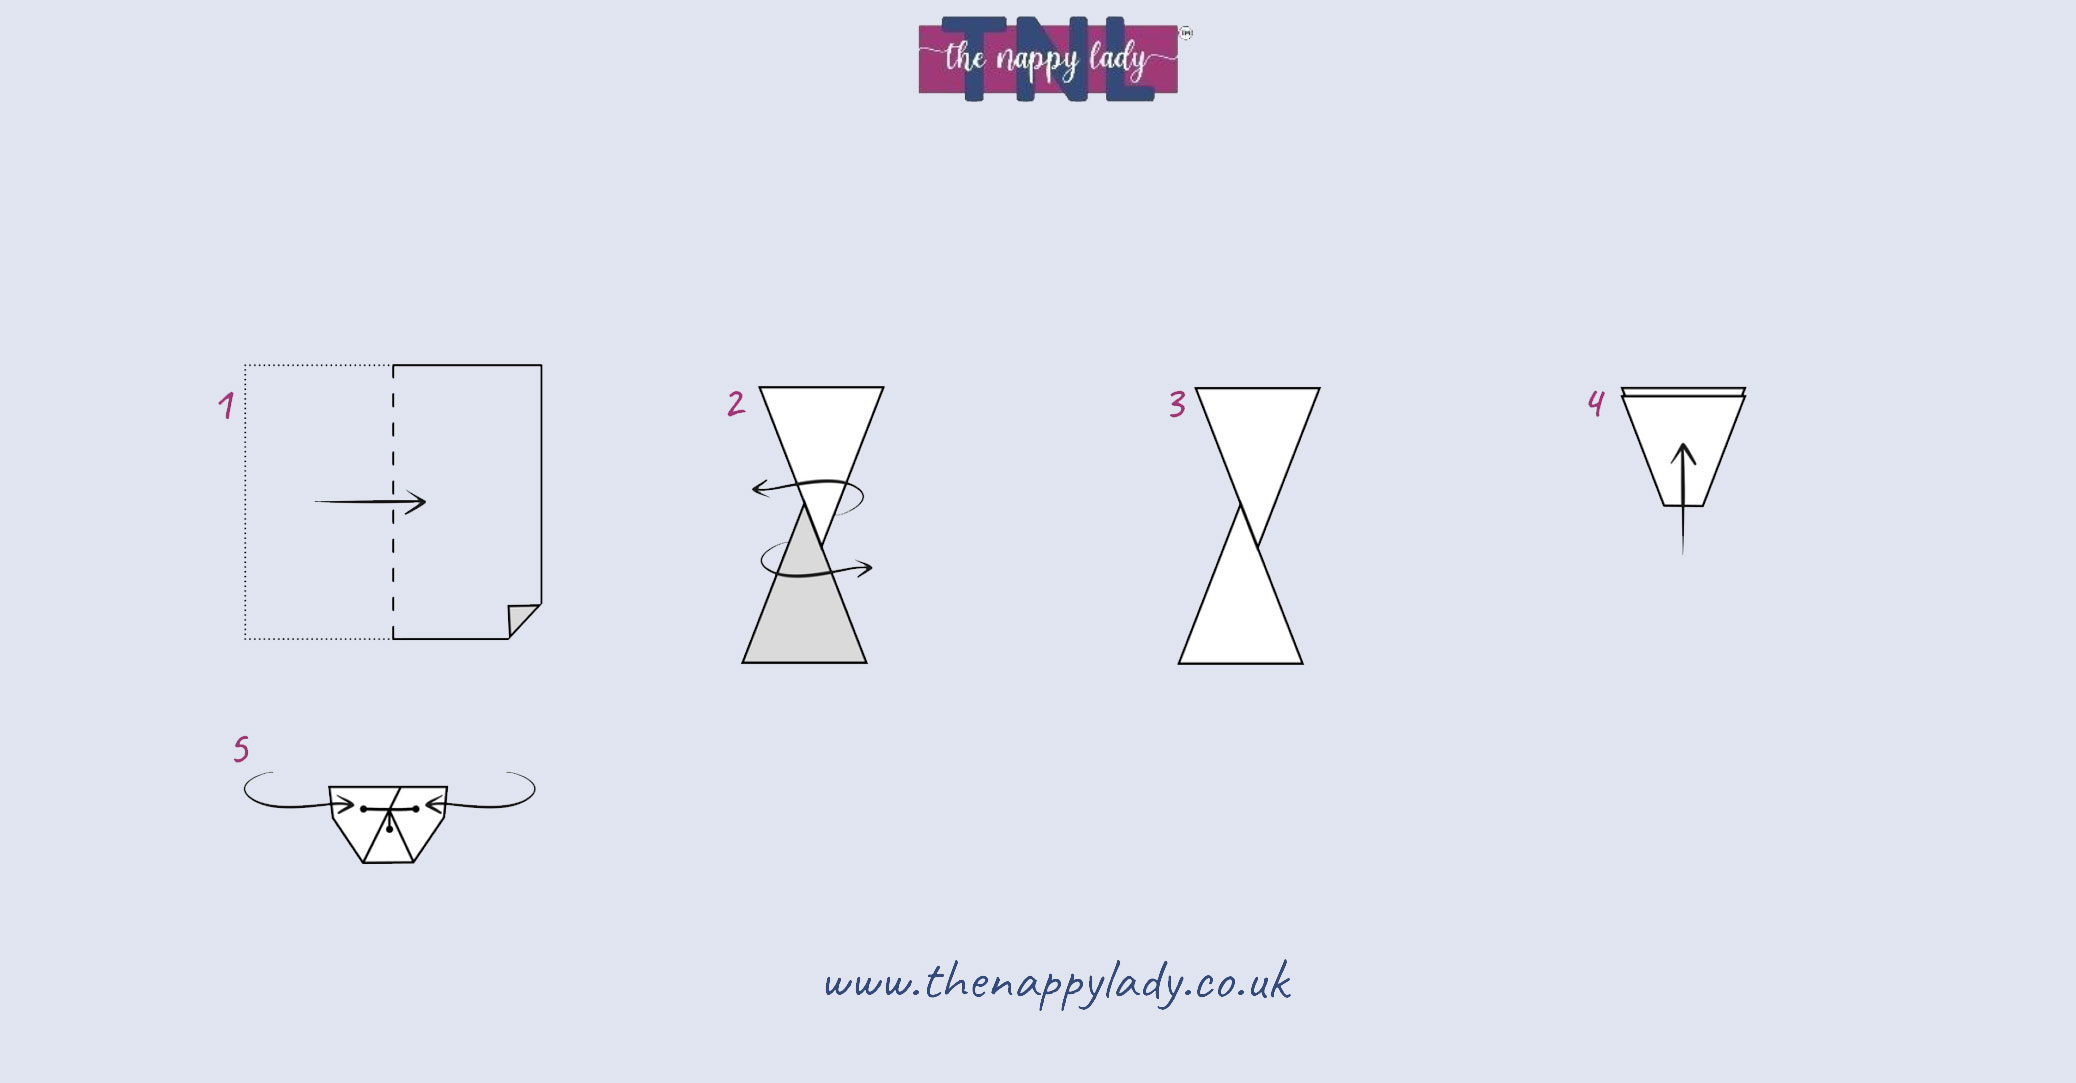
Prefold Bikini Twist Fold
If your baby has heavy thighs, this fold works like magic to give a high cut leg opening. You will have extra absorbency, too. Not really for a pre-weaning baby, but excellent for a toddler.
- Start with a toddler-size prefold.
- (For a boy) Fold a couple of inches of the prefold to the underside (B-C end). This will provides extra padding at the front.
- Turn the prefold all the way over at its midpoint (ie the fold ends up on top, so that it is inside when the prefold is pinned).
- Place the prefold under the baby.
- Bring the front of the prefold (corners B and C) up between the baby's legs.
- Tuck in B and C.
- Bring A and D around from the back and fasten with a nappy nippa.
Night Time Double For Prefolds
For maximum absorbency, this nappy fold gives 12 layers of cloth in the centre, but it is still easy to fasten and it fits snug and trim. As the baby no longer being changed overnight is assumed to be at least 3 months old, the larger size prefolds are appropriate. However, smaller ones can also be used for a younger baby.
- Stack two prefolds.
- Fold the sides of the top prefold in to form a pad.
- Fold the sides of the bottom prefold over the pad.
- Fold a small portion of the stack up in front.
- Unfold the sides of the bottom prefold in the back to form two wings.
- Place the prefold under the baby. Bring the front of the prefold up between the baby's legs.
- Bring the wings around from the back and fasten with a nappy nippa. Because the wings are from the bottom prefold only, you will be fastening only one layer of cloth to the front of the nappy.
Day Time Double For Prefolds
Rather than double prefolds, use boosters for extra absorbency during the day. They're not as bulky as double prefolds for night time wear and they allow your baby to move freely and comfortably. Instructions are basically the same as for the night time double.
- Start with a regular prefold.
- Place the booster pad in the centre of the prefold.
- Fold the sides of the bottom prefold over the booster pad.
- Fold a small portion of the prefold and booster pad up in front.
- Unfold the sides of the bottom prefold in the back to form two wings.
- Place the prefold under the baby. Bring the front of the prefold up between the baby's legs.
- Bring the wings around from the back and fasten with a nappy nippa. Because the wings are from the bottom prefold only, you will be fastening only one layer of cloth to the front of the nappy.
Boy Fold For Prefold Without Nappi Nippas
Because of the first step, it retains its its fanned and folded shape well. As it provides the bulk at the front, it is especially good on boys.
- Lie prefold in front of you with centre panel in the middle.
- Fold over around 2" towards you.
- Fold over the left hand panel of the prefold towards the right hand side.
- Fold over the right hand panel of the prefold towards the left hand side and tuck into the opposite fold. This keeps the pad folded shape secure.
- Fan the edges so that there is a larger area of prefold under baby's bottom. Turn the whole thing over, place into wrap, tucked under the front flap (if your wrap offers this), and place a liner on top.
Girl Fold For Prefolds Without Nappi Nippas
The standard way of folding a prefold into a wrap designed for this type of nappy. This gives a thicker section in between the legs, and so is especially suitable for girls. Folding a prefold this way means that there is no fanning of the prefold under the bottom area (because nothing to fold the front in place as you spread the back), so is probably better kept for heavier wetting girls, and use the boy fold for better bottom comfort with average wetters.
- Have the thicker section running from left to right and then fold it into thirds. That's it!


